Debugging on Mobile Devices
Overview
In this document you will learn how to get started with debugging on mobile devices and covers the following solutions:
- Debugging on iOS devices
- Debugging on Android devices
- Using Charles on mobile devices
Debugging with iOS
Minimum requirements for iOS debugging
- Safari version 6+ running on Mac MacOS
- iPhone or iPad with iOS 6+
Using Safari Remote Debugging
Apple's iOS 6 update introduced Safari Remote Debugging, which allows you debug web pages in the Safari app on iOS devices. To get started, follow the steps below:
- Connect your iOS device to your machine via USB cable.
- On your device, open the Settings app. Select Safari, scroll down to the bottom of the page and open the Advanced menu. Enable the Web Inspector option.
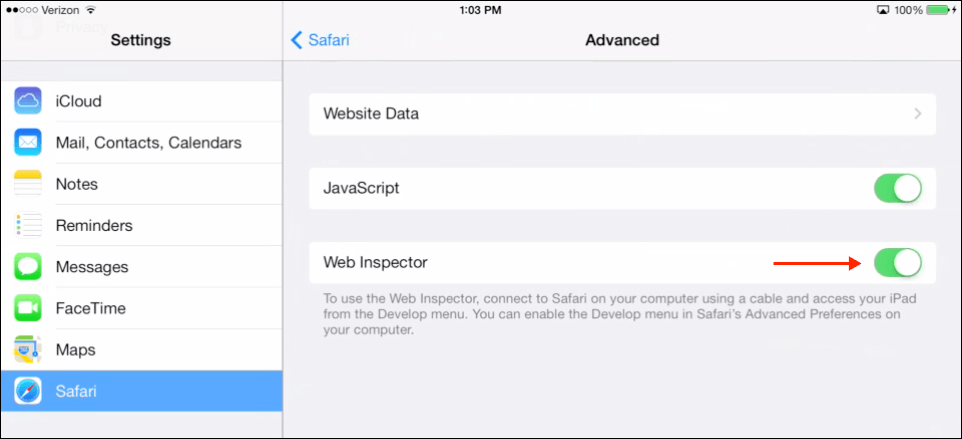
Web Inspector - Still on your device, open the Safari app and browse to any web page.
- On your Mac, launch Safari, open the Preferences (Safari > Preferences), and navigate to the Advanced section. Enable the Show Develop menu in the menu bar option.
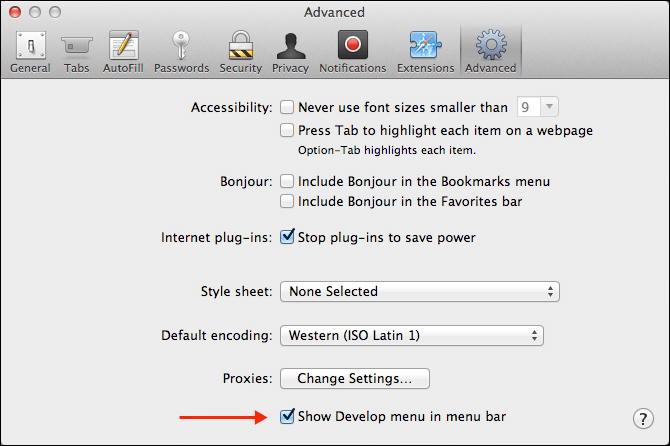
Show Develop Menu - Open the Develop menu. You will see your iOS device listed. When you mouse over your device name, you will see the URL to the site you've browsed to on your device displayed.
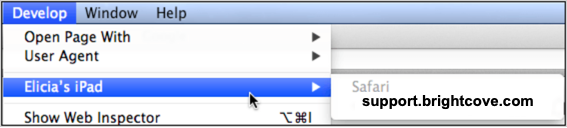
Find the Device - Select the URL and a Web Inspector window will open, allowing you to preview, inspect, and debug content on your mobile browser from your desktop.
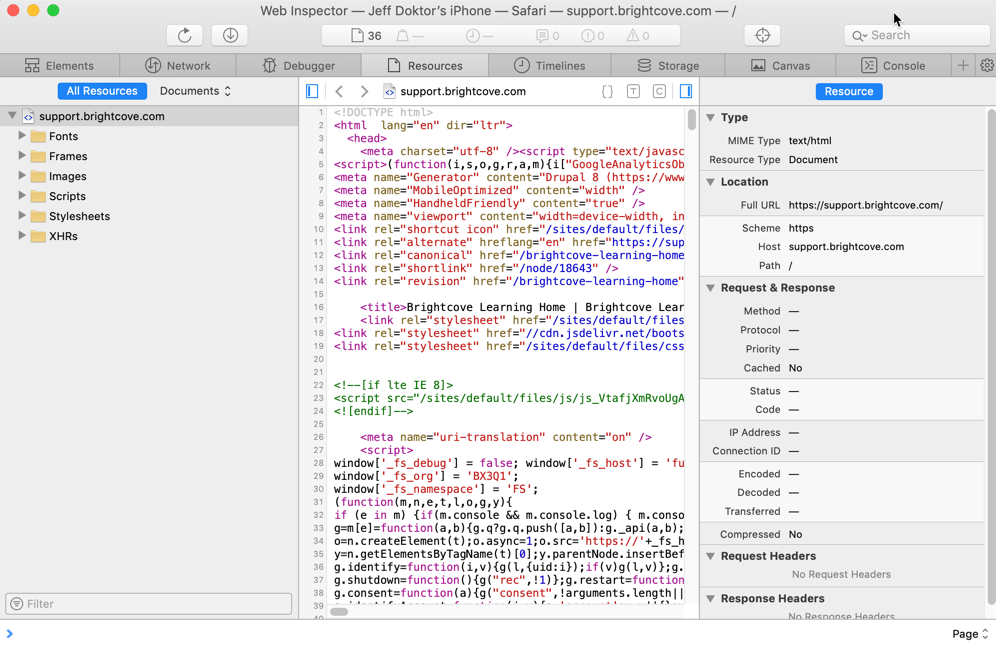
Debug on Desktop - In the Resources section, you can preview and inspect the web page. Hovering over elements in the Web Inspector will highlight the corresponding elements in the browser on your iOS device.

Inspecting Elements - You can also use the Debugger and Console sections to further debug your page by setting breakpoints, logging data, etc.
Debugging with Android
Minimum requirements for Android debugging
- Chrome 32+ running on Mac or Windows
- Android device with Chrome for Android 32+
Note: The steps in this section were written using a device running Android 11.
Enabling debugging on your device
Before you can begin debugging content on your device, you need to enable USB debugging in your device settings.
- If you are a running Android 4.2+, you will need to enable your device's Developer options before you can turn on USB debugging. On your device, open the Settings app and select the About phone menu. Locate your device's Build number and tap it seven times.
- Enter your device password. You should now see a message that states, You are now a developer!.
- To access your Developer options in Android 11, return to Settings and select System.
- Expand Advanced, and tap Developer options.
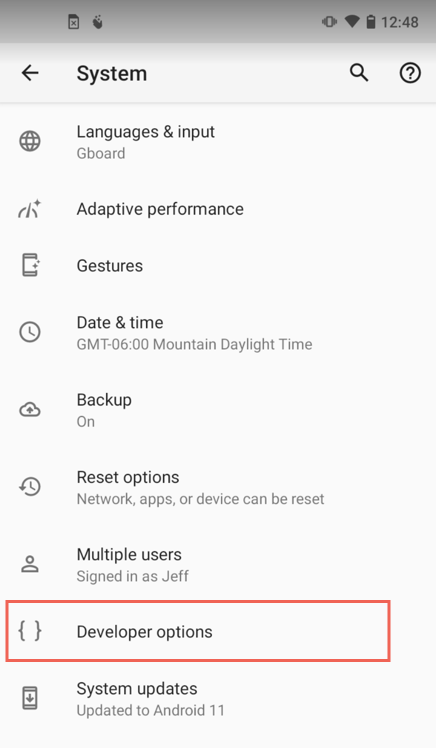
Developer options - Scroll down to USB debugging and turn on the toggle.
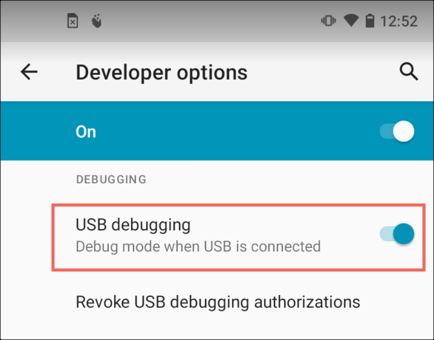
Enable USB Debugging - For more details, see Android's Configure on-device developer options document.
Remote debugging using Chrome for Android
Now that USB debugging is enabled on your device, follow these steps to start remote debugging with Chrome:
- On your computer, launch Chrome and browse to
chrome://inspect#devices. - Select the checkbox for Discover USB devices.
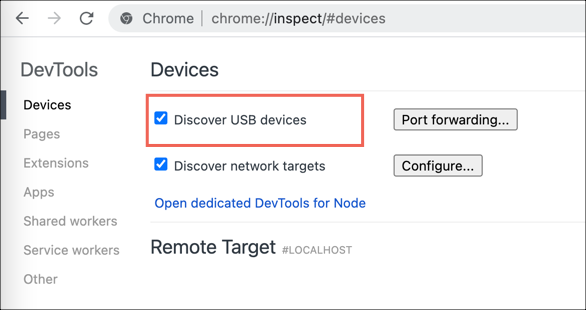
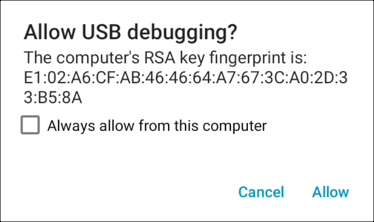
Discover USB Devices - Connect your device to your machine using a USB cable. On your device, you will be prompted with a dialog asking if you would like to allow USB debugging. Select Allow to let your computer to connect to your device.
Allow Connection to Device - On your device, open the Chrome app and browse to a web page.
- Return to Chrome on your computer. On the
chrome://inspect#devicespage, you should see your connected device. Below your device name, you will be able to see a list of all of the pages open in Chrome on your device.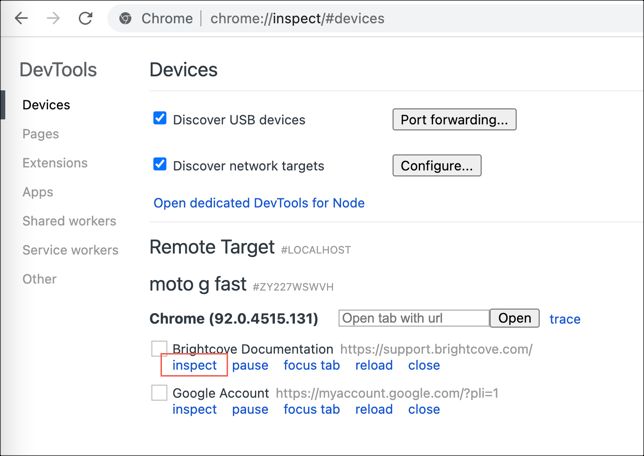
Connected Devices - To begin debugging a web page, select the inspect link below the page URL. This will open Chrome's Developer Tools.
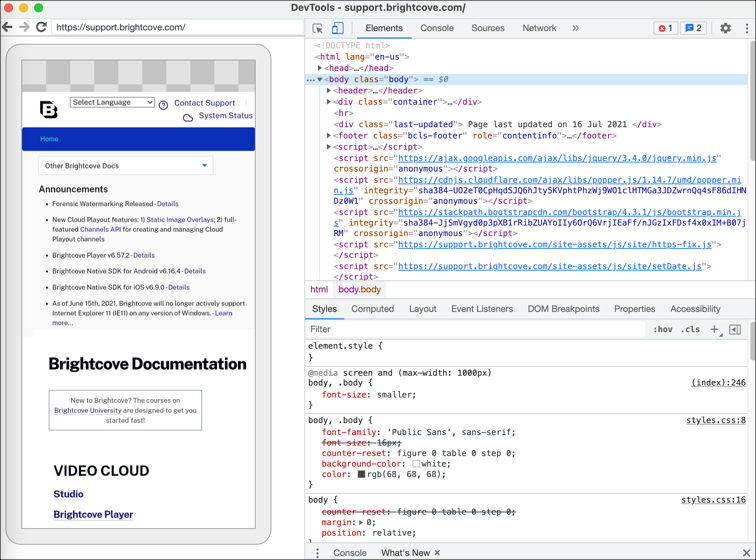
Inspect Web Page - To the left of the Elements tab, you can select the device icon to open DevTool's Screencast feature. This allows you to open a live preview of the content as it appears on your mobile device. For more information on how you can use screencasting to interact with your device, visit Google's documentation.
Setting up Charles Proxy
Charles is a web proxy that can be run on your own computer, allowing you to record data that is sent and received via your web browser. Visit the Charles website for more information on this application.
Minimum requirements for Charles
- Charles is compatible with Windows, Mac and Linux
- iOS and/or Android device
Follow the steps below to get Charles running on your machine.
- Download and install Charles on your machine.
- On your computer, run Charles. From the menu, select Proxy > Proxy Settings. Ensure a port has been assigned (e.g., 8888).
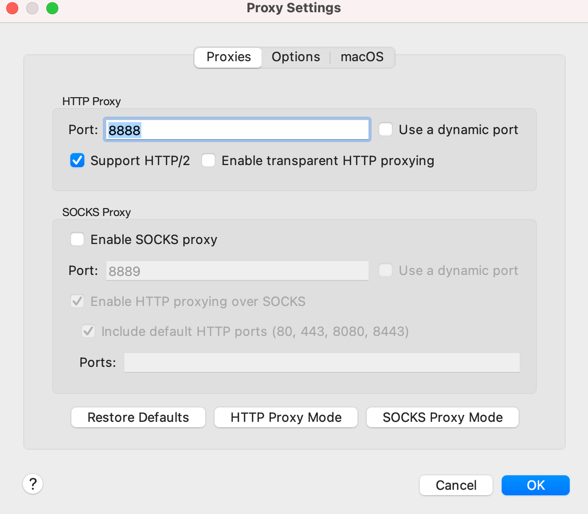
Proxy settings - Select OK to save changes and close the dialog.
- From the menu, select Proxy > SSL Proxy Settings. Ensure the Enable SSL Proxying option is selected.
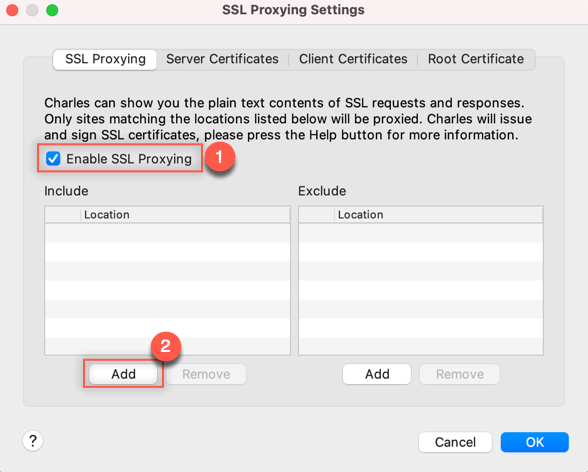
SSL Proxy settings - In the Location section, select the Add button. In the Edit Location dialog, navigate to the Port field and enter 443. Select OK to save this change.
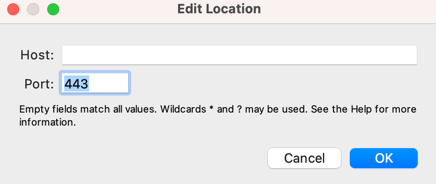
Location port 443 - Select OK to close the Edit Location dialog.
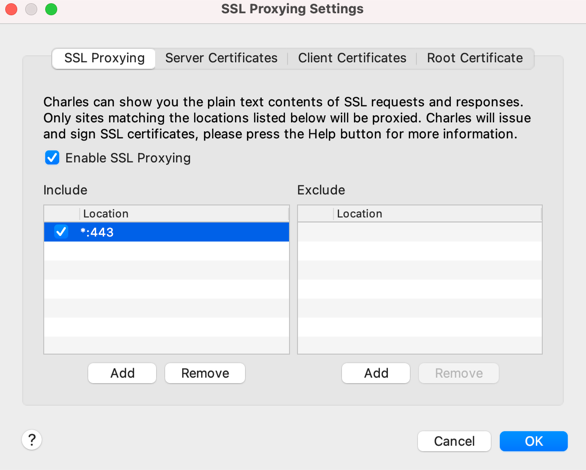
SSL settings with location - Select OK to exit the SSL Proxying Settings dialog.
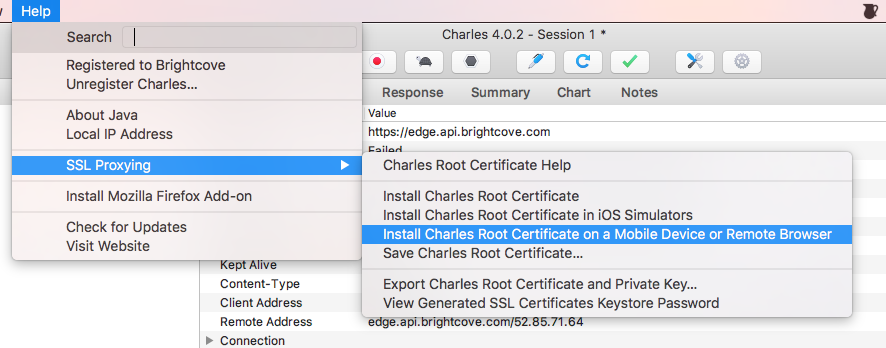
- Navigate to Help > SSL Proxying > Install Charles Root Certificate on a Mobile Device or Remote Browser.
Install root certificate - You should see a message that identifies the local Server IP and Port number (8888) that you will use to set up the device. You should also see the URL to download and install the certificate. Copy these to your computer for later use.
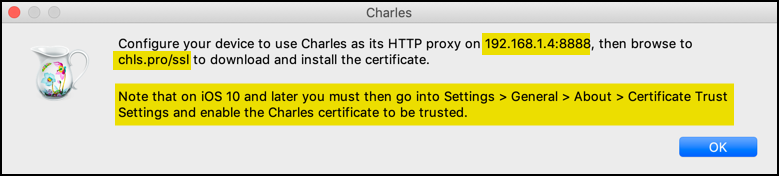
Certificate message
Using Charles with iOS devices
In this section, you will learn how to set up your iOS device to work with Charles on your computer.
- On your device, make sure you are connected to the same network as your computer. You can verify this by navigating to settings > Wifi and selecting the network name to show advanced options.
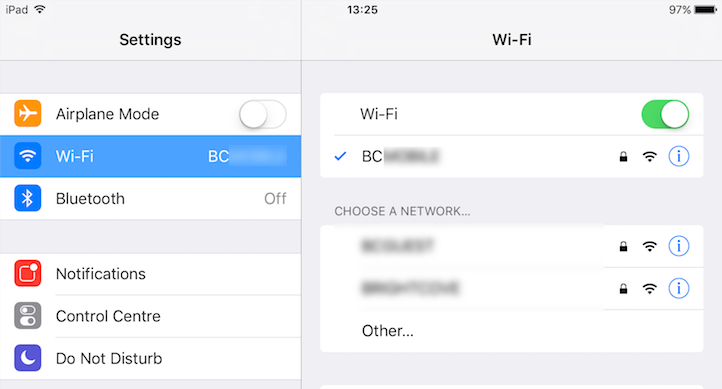
Device network - In the HTTP section at the bottom, select Manual mode. Then, add the Server IP and Port number (8888) that you copied from Charles in a previous step.
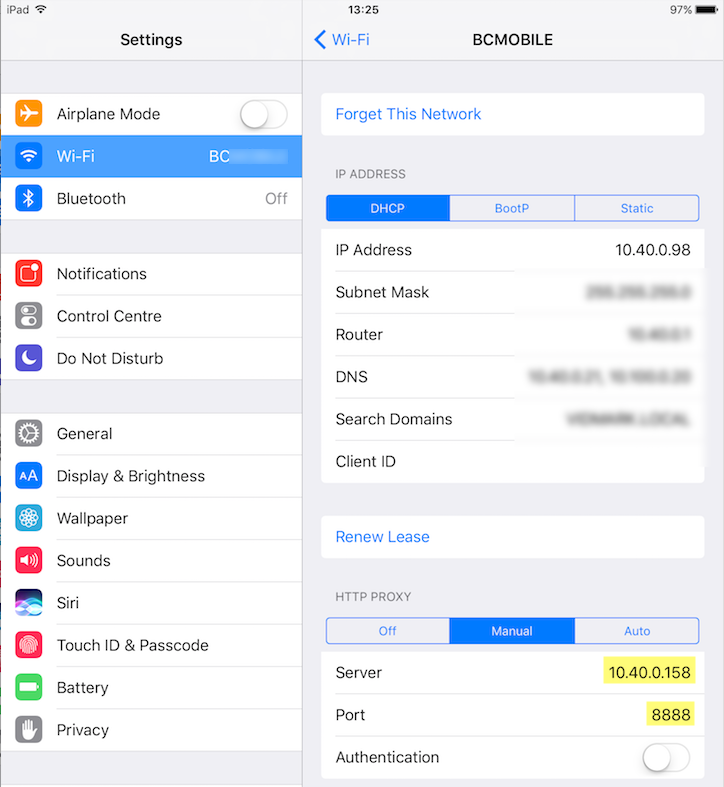
Wifi details - On your device, open a browser and navigate to https://www.charlesproxy.com/getssl. You will be redirected to your device settings where you will be prompted to install the Charles Proxy Custom Root Certificate profile. Select the Install button to install the Charles certificate on your device.
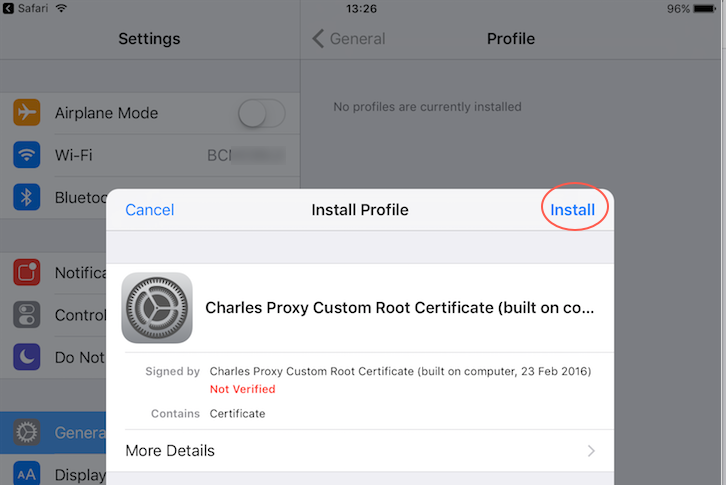
Install Charles certificate - Follow the steps to install the Charles certificate. When complete, select Done.
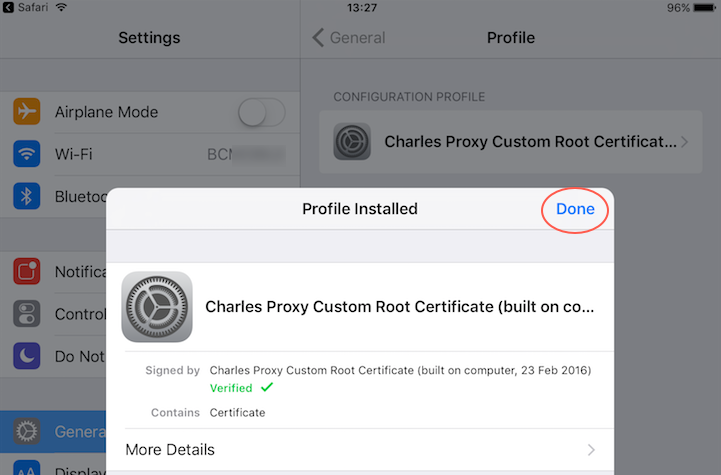
Charles profile installed - Next, you are ready to ensure that your device trusts the Charles certificate. On your device, navigate to General > About > Certificate Trust Settings. Here you should find the Charles Proxy certificate.
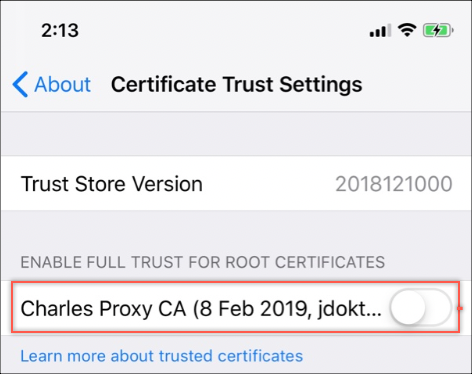
Certificate Trust Settings - Enable the Charles certificate. Notice the warning message. You may want to disable this certificate when not debugging with Charles.
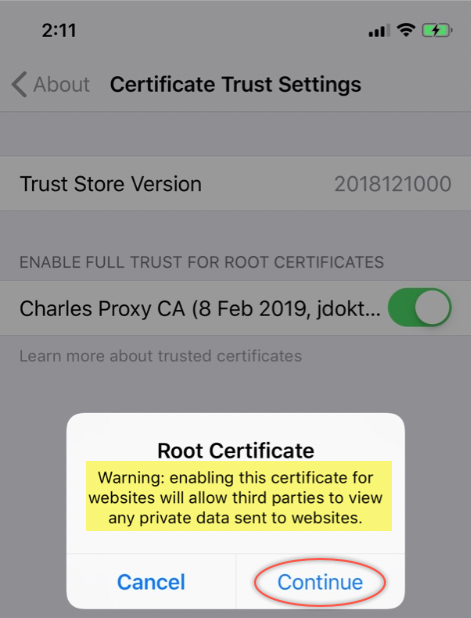
Enable trust certificate - Now, you will be able to see any data sent and received in Charles.
See Charles data
Using Charles with Android 11
In this section, you will learn how to set up your Android device to work with Charles on your computer.
- On your device, go to Settings > Network & internet.
- Tap Wi-Fi.You will see a list of networks that you have connected to on your device.
- Select the wireless network that you are currently connected to. Remember, this network must match the network you are connected to on your computer..
- Tap the pencil icon to edit your internet settings.
- Set Proxy to Manual.
- Paste the value for your Charles Proxy hostname, which you should have copied it to your clipboard in the step above. For the Proxy port, enter
8888.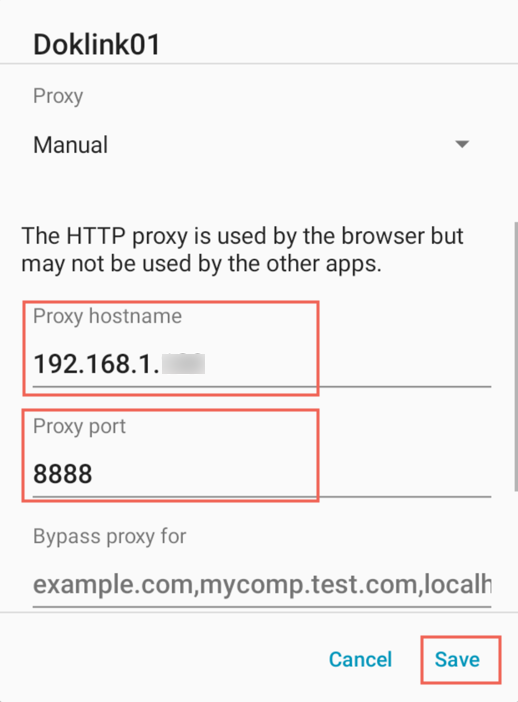
Proxy host/port values - Tap Save.
- On your device, open a browser, navigate to https://www.charlesproxy.com/getssl/. This should automatically download the Charles SSL certificate to your device.
- To install the certificate with Android 11, follow these steps:
- Open Settings.
- Navigate to Security > Encryption & credentials > Install a certificate.
- Select CA certificate.
- You will see a warning. Select Install anyway.
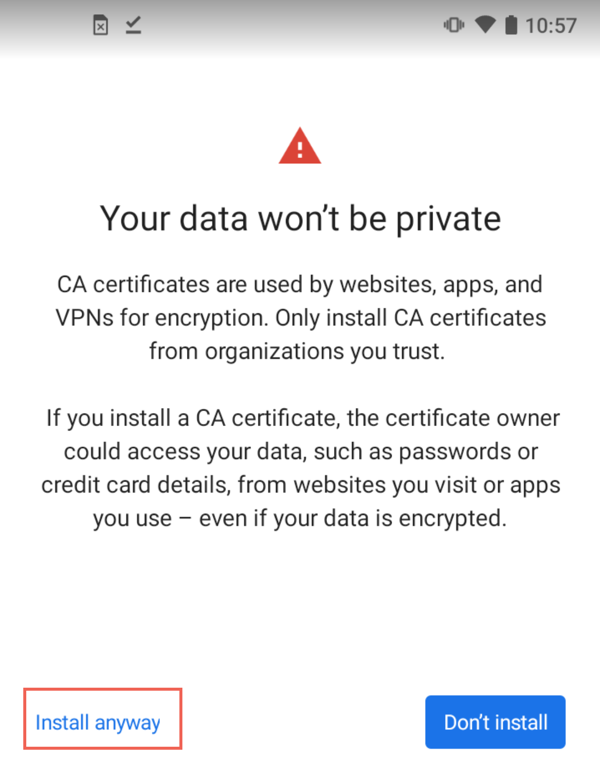
Install anyway - Select the Charles proxy SSL certificate.
- Confirm the certificate installation.
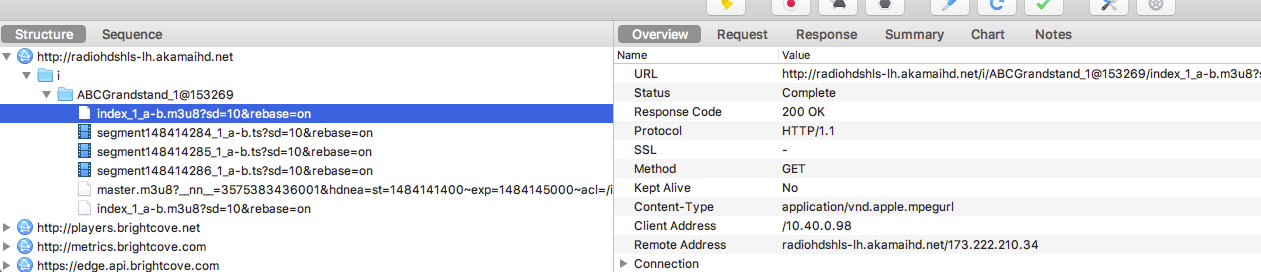
- In your device's default browser, navigate to a website. You will be able to see any data sent and received in Charles. Note that it may help to filter the structure list (in this case filter for brightcove).
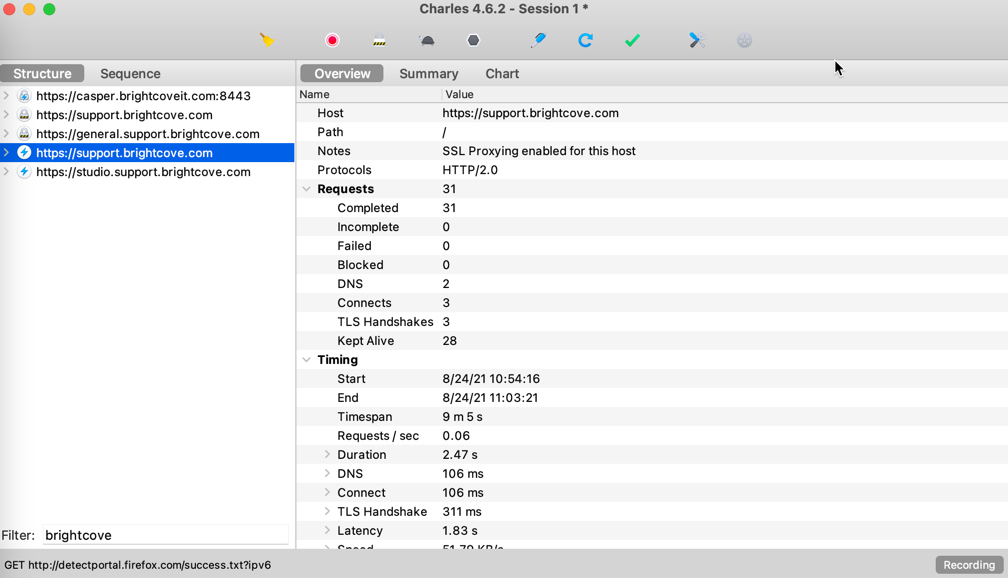
See Data Transfer - To filter network traffic so that you only see traffic from your Android device and not your local machine:
- In the Charles top menu, select Proxy.
- Uncheck macOS Proxy (or Windows Proxy).
- Optional: To clear certificates from your device (running Android 11):
- On your device, open Settings.
- Navigate to Security > Encryption & credentials.
- Tap Clear credentials.
- Tap OK to confirm.
Using Charles with Android 7 and later
Beginning with Android 7 (SDK v24), the SSL network is no longer directly viewable as this SDK version introduced a new security feature. To see network traffic through Charles, you need to explicitly tell your Android application to allow SSL intercepts.
-
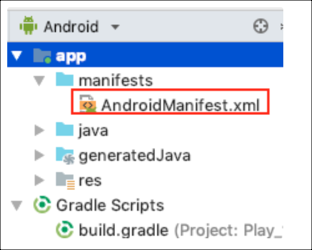
In your application, open the AndroidManifest.xml file.
-
In the
applicationsection, add anetworkSecurityConfigoption.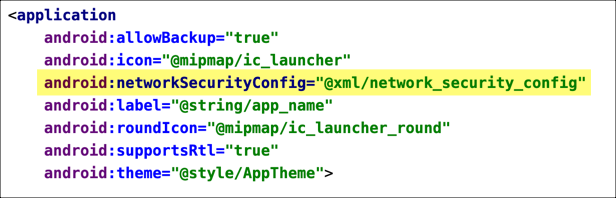
-
In an xml resource folder, add a
network_security_config.xmlfile as follows: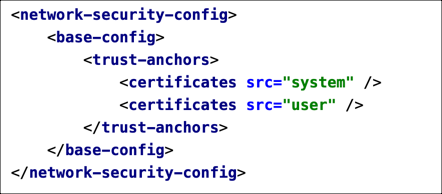
- That's it. You should now see all network traffic coming through Charles.
Resources
For details, see the following: