In order to test the Playback Adapter and CMS Connector that allow you to continue using Ooyala players to deliver Video Cloud content, you will need to add a DNS server to your systems and provide some information to Brightcove for the configuration. This topic walks you through the steps.
Introduction
To test the Playback Adapter that will allow your Ooyala players to deliver content from Video Cloud, and/or to use the CMS Connector that allows you to use some operations of the Backlot API to manage your media in Video Cloud, two things must happen:
- First: contact your CXM to initiate the process. Your CXM will need to get IP addresses from you and will help you find them if you don't know how to do it. Your CXM can also help you with the steps explained in the rest of this document that you must perform.
- What you need to do for each computer and device that will be using the Playback Adapter or CMS Connector is to add a Brightcove DNS server that will redirect requests sent to ooyala.com resources to the appropriate Brightcove APIs. The steps for doing this are detailed in the sections that follow.
MacOS steps
Assuming you aren’t on a VPN, below are the steps for adding the Brightcove DNS server on MacOS for Mac laptop and desktop computers.
- Open System Preferences:
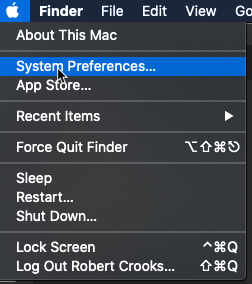
Open System Preferences - Open the Network Preferences:
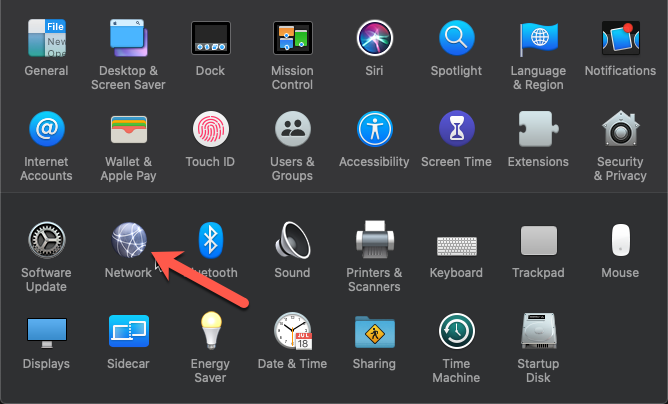
Open Network Preferences - Click On the Advanced settings:
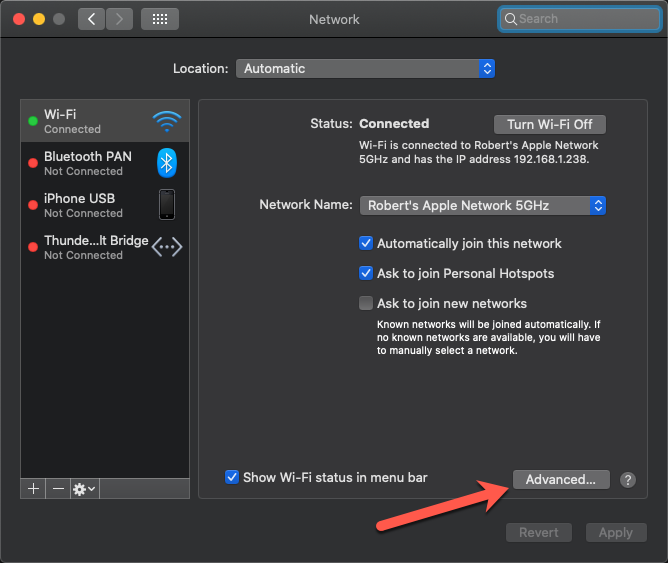
Open Advanced Settings - Open the DNS settings:
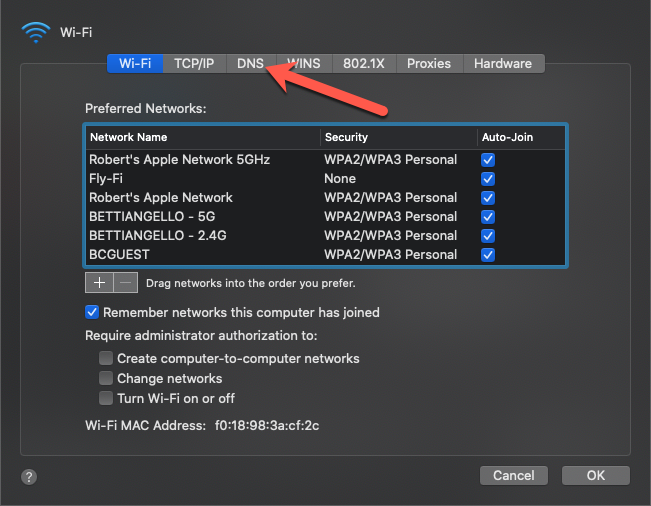
Open DNS Settings - Click the
+sign to add a DNS server: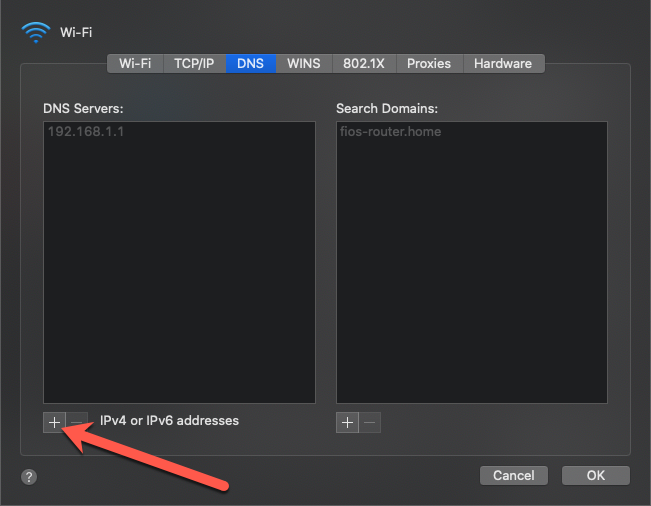
Add DNS Server - Enter the following address for the new DNS server:
35.170.73.174 - Click the
+sign under Search Domains to add a search domain: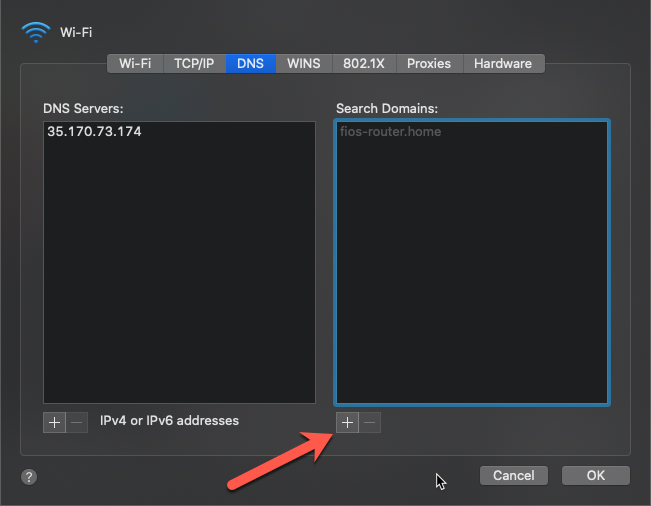
Add Search Domain - Enter the following search domain:
ooyala.com - Click OK to close the Advanced settings.
- Click Apply to save the new settings.
- Restart your Mac to clear the DNS cache.
Windows 10 steps
Below are the steps for adding the Brightcove DNS server on Windows 10 for laptop and desktop computers.
- Open Control Panel.
- Click on Network and Internet.
- Click on Network and Sharing Center.
- Click the Change adapter settings option in the left pane.
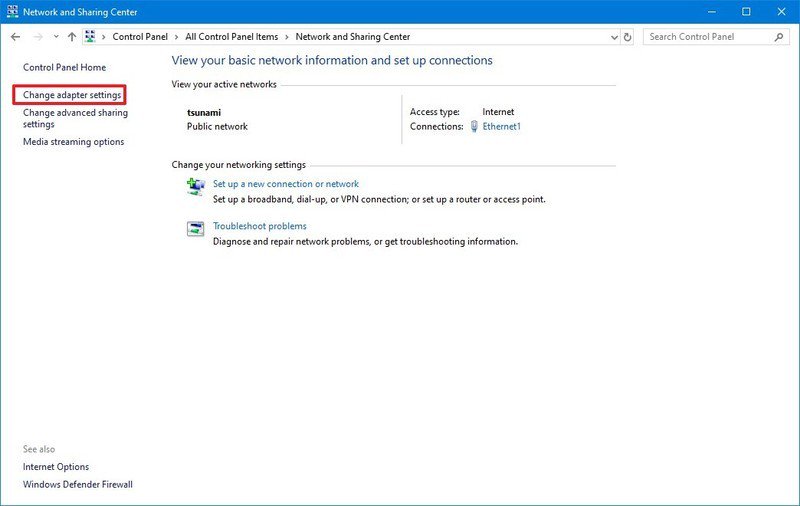
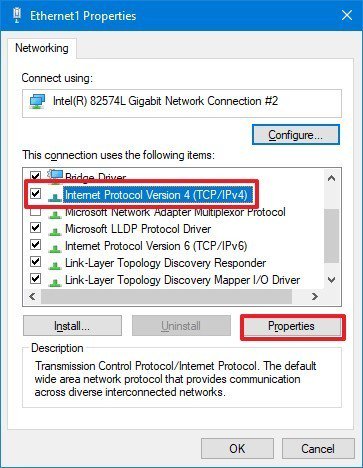
Change Adapter Settings - Right-click the network interface connected to the internet, and select the Properties option:
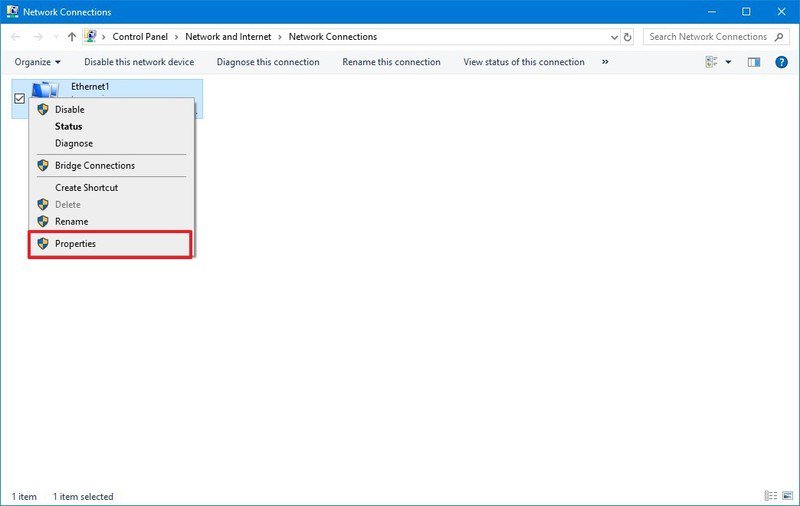
Network Interface Properties - Select and check the Internet Protocol Version 4 (TCP/IPv4) option.
- Click the Properties button.
Network Connection Properties - Click the Use the following DNS server addresses option.
- For you Preferred on Alternate DNS server address, enter
35.170.73.174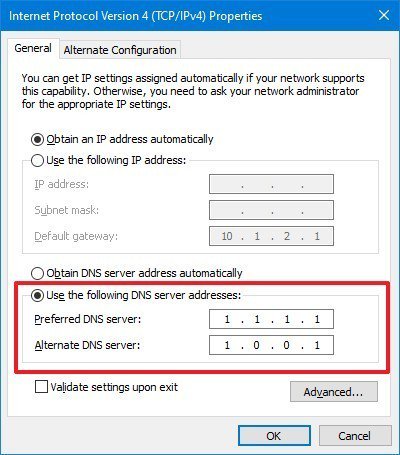
Enter DNS Server Address - Click OK.
- Click Close
- Restart the computer to clear the DNS cache.
iOS steps
Below are the steps for adding the Brightcove DNS server on iOS for iPhones and iPads.
Note that the device must be on a Wi-Fi connection to make this change.
- Open Settings:
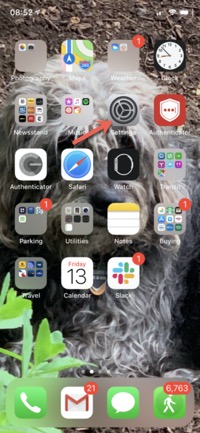
Open Settings - Open the Wi-Fi settings:
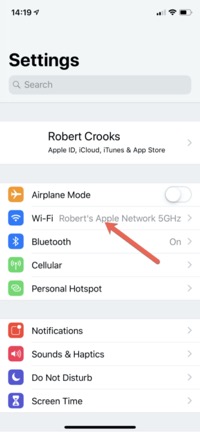
Open WiFi Settings - Open the I (information) for the current network:
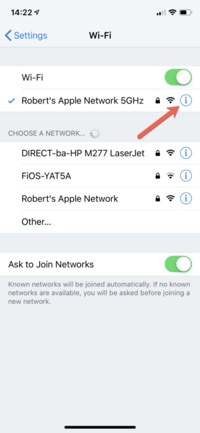
Information for Current Network - Tap Configure DNS to change the configuration:
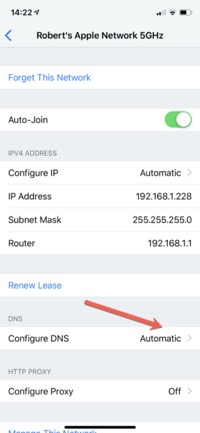
Configure DNS - Change the DNS configuration from Automatic to Manual
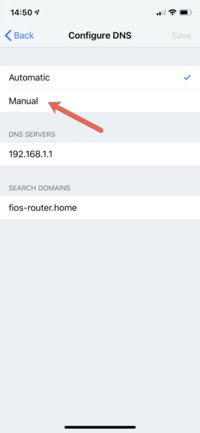
Change DNS to Manual - Add a DNS server:

Add DNS Server - For the new server address, enter
35.170.73.174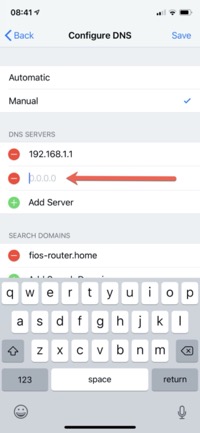
Enter Server Address - Save your settings.
- Restart the device to clear the DNS cache.
Android steps
Because of the different versions of Android, and the different ways of changing the DNS server depending on whether you have root access to the device, and if you are using system settings or a third party app, we recommend that you contact your CXM for help with making this change on Android. If you would rather try it yourself first, you can try the instructions here.
Special case: VPN
The above steps may not work if your computer/device is on VPN, because the VPN server may override your DNS server settings with its own. If this happens, you will need to add the Brightcove DNS server to you VPN. Exactly what commands you will need will depend on the platform and VPN, but a sample for MacOS is shown below to give you an idea.
Get the subKey for the DNS entry on the VPN interface. E.g. with Pulse Secure, it looks like:
sudo scutil
> get subKey [127 = State:/Network/Service/net.pulsesecure.pulse.nc.main/DNS]
> d.add ServerAddresses * 35.170.73.174
> set State:/Network/Service/net.pulsesecure.pulse.nc.main/DNS